
To add a subdomain in a DigitalOcean droplet, you need to follow a few simple steps. First, log in to your DigitalOcean account and navigate to the Networking section.
Then, click on the domain name where you want to add the subdomain. Next, click on the “Add Record” button and select “CNAME” as the record type. Enter the desired subdomain name and the droplet’s IP address or hostname. Finally, save the changes and wait for the DNS propagation to complete.
This process allows you to easily create and manage subdomains for your DigitalOcean droplet. Adding a subdomain to your DigitalOcean droplet can be a quick and straightforward process. By following a few simple steps, you can easily create and manage subdomains for your website or application. In this blog post, we will guide you through the process of adding a subdomain in a DigitalOcean droplet, allowing you to organize and structure your online presence more effectively. Whether you are setting up a blog, an e-commerce store, or any other type of website, adding a subdomain can help you create a more intuitive and user-friendly experience for your visitors. So, let’s get started and learn how to add a subdomain in DigitalOcean droplet.
Credit: docs.digitalocean.com
Introduction To Digitalocean Droplets And Subdomains
Learn how to easily incorporate a subdomain into your DigitalOcean droplet. Enhance your website functionality with this simple setup.
What Is A Digitalocean Droplet?
A DigitalOcean Droplet is a virtual private server that can be deployed quickly.
It serves as a scalable and flexible cloud computing solution.
Benefits Of Using Subdomains
Subdomains help organize and structure your website for better navigation.
They can also improve SEO by targeting specific content areas.
Credit: docs.digitalocean.com
Prerequisites Before Adding A Subdomain
Adding a subdomain in DigitalOcean Droplet can be a simple process, but before you begin, there are a few prerequisites you need to have in place. These prerequisites will ensure that your subdomain can be added without any issues.
Setting Up A Digitalocean Account
The first prerequisite is to have a DigitalOcean account. If you don’t have one already, you can sign up for free on their website. Once you have created your account, you will need to add a payment method to your account to be able to create a Droplet.
Creating Your First Droplet
The second prerequisite is to create a Droplet. A Droplet is a virtual machine that runs on DigitalOcean’s cloud infrastructure. You can create a Droplet by following the steps on their website. Once you have created your Droplet, you will need to set up your server, install any necessary software, and configure your firewall.
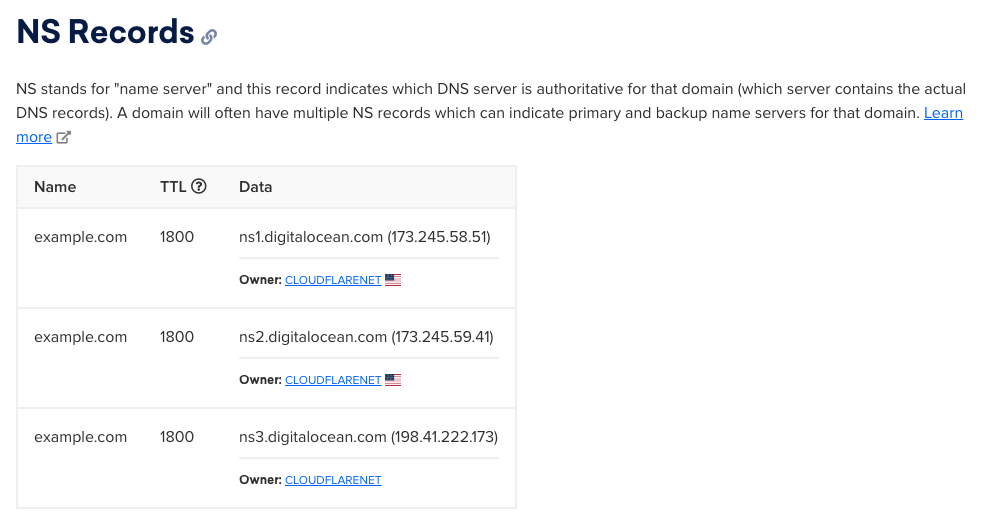
Domain Registration And Dns Overview
The third prerequisite is to have a registered domain name and a basic understanding of DNS. You can register a domain name with any domain registrar and point it to your Droplet’s IP address using DNS. If you are not familiar with DNS, you can learn more about it on DigitalOcean’s website.
Once you have these prerequisites in place, you can proceed with adding your subdomain to your Droplet. This process will involve configuring your DNS records and setting up your web server to respond to requests for your subdomain.
Dns Configuration For Subdomains
To add a subdomain in DigitalOcean droplet, you need to configure the DNS settings by creating a new ‘A’ record pointing to the droplet’s IP address. Then, update the DNS configuration for the subdomain in the domain’s DNS management interface.
This ensures that the subdomain is correctly linked to the DigitalOcean droplet.
Accessing The Digitalocean Dns Panel
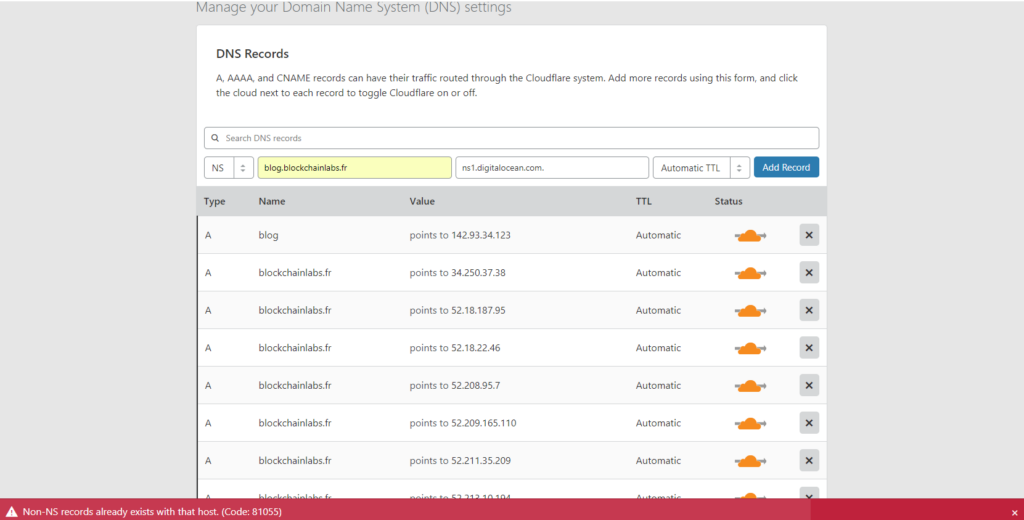
To begin adding a subdomain to your DigitalOcean droplet, you need to access the DigitalOcean DNS panel. This can be done by logging into your DigitalOcean account and navigating to the Networking section. From there, select the domain for which you want to add the subdomain, and then proceed to the DNS settings.
Understanding A, Cname, And Other Dns Records
When configuring DNS records for your subdomain, it’s essential to understand the different types of records, such as A, CNAME, and others. The A record links a domain to an IP address, while the CNAME record points a subdomain to another domain name. You may also encounter other records like MX for mail servers and TXT for text records. Each of these records serves a specific purpose in the DNS configuration.
Creating The Subdomain In Digitalocean
Learn how to easily add a subdomain to your DigitalOcean droplet with this step-by-step guide. Create a subdomain in DigitalOcean without any hassle and enhance your website’s functionality.
Creating the Subdomain in DigitalOcean requires navigating to the networking section and adding subdomain records. To get started, log in to your DigitalOcean account and select the relevant droplet from the dashboard. Next, follow the steps below to create a subdomain. ### Navigating to the Networking Section Once you have selected the droplet, navigate to the networking section. To do this, click on the Networking tab and select the domain for which you want to create a subdomain. ### Adding Subdomain Records To create a subdomain, you will need to add subdomain records. In the DNS section, click on the Add Record button and select the record type as A. In the hostname field, add the name of the subdomain that you want to create. In the IP address field, add the IP address of your droplet. You can also add other types of records like CNAME, MX, etc. depending on your requirements. Once you have added the subdomain records, click on the Save button to save the changes. That’s it! You have successfully created a subdomain in DigitalOcean. Now, you can use this subdomain to host your website or any other application.Configuring Your Web Server For The New Subdomain
Configuring your web server for a new subdomain on DigitalOcean Droplet is a simple process. First, create a DNS record for the subdomain. Then, configure the web server to recognize the new subdomain and point it to the correct directory.
Finally, test the subdomain to ensure it is working properly.
Adjusting Nginx Configuration
When it comes to configuring your web server for the new subdomain on your DigitalOcean Droplet, adjusting the Nginx configuration is an essential step. Nginx is a popular web server that provides high performance and scalability. Follow these steps to configure Nginx for your subdomain:
- Connect to your Droplet using SSH.
- Navigate to the Nginx configuration directory by running the command
cd /etc/nginx/sites-available. - Create a new configuration file for your subdomain using the command
sudo nano subdomain.conf. - In the configuration file, add the necessary server block for your subdomain, including the server name, root directory, and any additional directives you require.
- Save and exit the file.
- Create a symbolic link to enable the new configuration file by running the command
sudo ln -s /etc/nginx/sites-available/subdomain.conf /etc/nginx/sites-enabled/. - Test the Nginx configuration for any syntax errors by running the command
sudo nginx -t. - If the test is successful, reload the Nginx configuration by running the command
sudo systemctl reload nginx.
Configuring Apache For Subdomains
If you are using Apache as your web server, configuring it for subdomains requires a slightly different approach. Apache is a widely used web server known for its flexibility. Follow these steps to configure Apache for your subdomain:
- Connect to your Droplet using SSH.
- Navigate to the Apache configuration directory by running the command
cd /etc/apache2/sites-available. - Create a new configuration file for your subdomain using the command
sudo nano subdomain.conf. - In the configuration file, add the necessary
VirtualHostblock for your subdomain, including the server name, document root, and any additional directives you require. - Save and exit the file.
- Enable the new configuration file by running the command
sudo a2ensite subdomain.conf. - Test the Apache configuration for any syntax errors by running the command
sudo apache2ctl configtest. - If the test is successful, restart Apache by running the command
sudo systemctl restart apache2.
By following these steps, you can easily configure your Nginx or Apache web server to handle the new subdomain on your DigitalOcean Droplet. Make sure to double-check your configurations and test the server after making any changes to ensure everything is working smoothly.
Ssl Certificates For Secure Subdomains
SSL certificates play a crucial role in ensuring the security of subdomains on your DigitalOcean droplet. By adding SSL certificates to your subdomains, you can provide a secure and encrypted connection for your website visitors. In this guide, we will walk you through the process of obtaining and installing SSL certificates for secure subdomains on your DigitalOcean droplet.
Obtaining Ssl Certificates
When it comes to obtaining SSL certificates for your subdomains, you have several options. You can either purchase SSL certificates from a trusted certificate authority, or you can use Let’s Encrypt, a free and open certificate authority.
- Option 1: Purchase SSL certificates from a trusted certificate authority.
- Option 2: Use Let’s Encrypt to obtain free SSL certificates for your subdomains.
Installing Certificates On The Droplet
Once you have obtained the SSL certificates for your subdomains, the next step is to install them on your DigitalOcean droplet. The process may vary depending on the web server you are using, such as Apache or Nginx.
- Upload the SSL certificates to your server.
- Configure your web server to use the SSL certificates for your subdomains.
- Test the SSL configuration to ensure that your subdomains are securely accessible.
Troubleshooting Common Subdomain Issues
To resolve common subdomain issues when adding a subdomain in a DigitalOcean droplet, ensure proper configuration of DNS records and server settings. Verify that the subdomain is correctly pointing to the droplet’s IP address and that the web server is set up to recognize the new subdomain.
Propagation Delays And How To Check Them
When adding a subdomain to your DigitalOcean droplet, you may encounter propagation delays. This is the time it takes for the changes to reflect across the internet.
To check the status of your subdomain’s propagation, use tools like DNS Checker or What’s My DNS.
Resolving Subdomain Not Working Problems
If you face issues with your subdomain not working, there are steps to resolve this problem. Ensure the DNS records are correctly set up.
- Verify the subdomain configuration in your domain registrar’s settings.
- Check the DNS settings in your DigitalOcean account to match the subdomain.
- Clear your browser cache to eliminate any cached DNS records causing conflicts.
Best Practices For Managing Subdomains
Adding a subdomain to a DigitalOcean droplet is a straightforward process. First, create a new A record in your DNS provider’s settings. Then, configure your server’s web server to recognize the new subdomain and serve content accordingly. Finally, update your firewall rules to allow traffic to the new subdomain.
With these steps, you can effectively manage subdomains on your DigitalOcean droplet.
Organizing Subdomains For Different Environments
Security Considerations For Subdomains
Best Practices for Managing Subdomains: Creating subdomains on your DigitalOcean droplet can help you organize your web projects efficiently. Organizing Subdomains for Different Environments – Use separate subdomains for development, staging, and production. – Keep subdomains’ naming convention clear and consistent. – Utilize subdomains to represent different versions of your site. Security Considerations for Subdomains – Secure each subdomain with SSL certificates. – Implement strong passwords for subdomains’ access. – Regularly update software and plugins for each subdomain.Conclusion: Streamlining Subdomain Management
Recap Of Key Steps
1. Log in to your DigitalOcean account.
2. Navigate to the Networking section and select Domains.
3. Add a new subdomain by creating an A record for your Droplet’s IP address.
4. Update the DNS records of your domain registrar.
5. Test the subdomain to ensure it is properly configured.
Expanding Your Digitalocean Skills
1. Learn about setting up SSL certificates for your subdomains.
2. Explore creating additional subdomains for different projects or services.
3. Consider implementing redirects or custom error pages for better user experience.
4. Engage with the DigitalOcean community for more tips and best practices.

Credit: community.cloudflare.com
Frequently Asked Questions
How Do I Add A Subdomain To A Digitalocean Droplet?
To add a subdomain to a DigitalOcean droplet, access your domain registrar and create a new DNS record pointing to your droplet’s IP address. Then, configure the subdomain on your droplet’s web server or application.
How Can I Add A Subdomain?
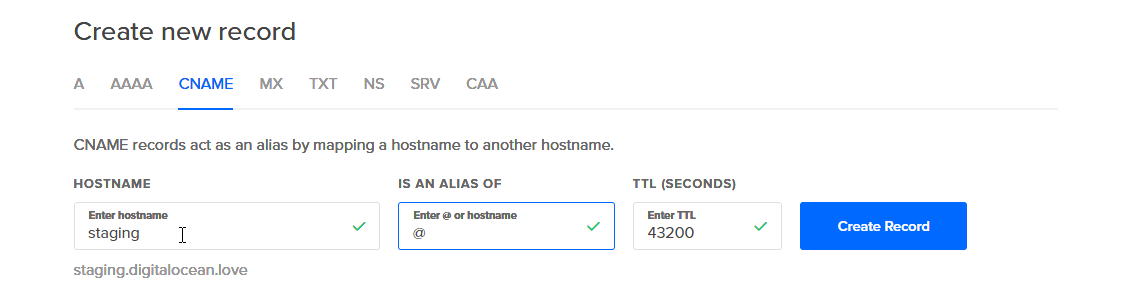
To add a subdomain, follow these steps: 1. Log in to your domain hosting provider’s website. 2. Navigate to the DNS management section. 3. Create a new CNAME record for the subdomain. 4. Specify the subdomain name and the destination URL.
5. Save the changes, and your subdomain will be added.
How Do I Link A Domain To A Digitalocean Droplet?
To link a domain to a DigitalOcean droplet, access your domain registrar’s website. Then, set the droplet’s IP address as the domain’s A record. Finally, configure the droplet’s web server software to recognize the domain.
How To Add Subdomain To Ssl?
To add a subdomain to SSL, follow these steps: 1. Access your SSL certificate provider’s dashboard. 2. Locate the option to manage or modify your certificate. 3. Look for the section related to subdomains or domain management. 4. Add the subdomain you want to secure.
5. Save your changes and wait for the certificate to be issued for the subdomain.
Conclusion
Adding a subdomain to your DigitalOcean droplet is a simple process that can offer great benefits. By following the steps outlined in this guide, you can easily create and manage subdomains to optimize your website’s performance and organization. Enhance your online presence with this valuable technique.


