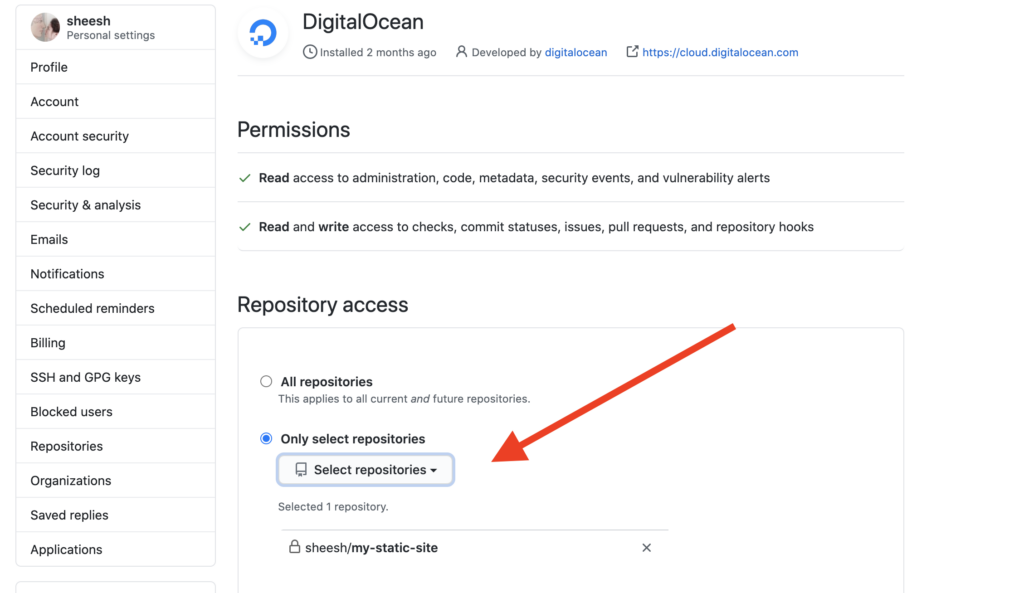
To connect Git to DigitalOcean, you need to generate an SSH key and add it to your DigitalOcean account. This allows you to securely authenticate your Git operations with your DigitalOcean droplets.
Connecting Git to DigitalOcean is a straightforward process that involves generating an SSH key and adding it to your DigitalOcean account. By doing so, you can ensure secure authentication for your Git operations with your DigitalOcean droplets. This guide will walk you through the necessary steps to establish a connection between Git and DigitalOcean, enabling seamless collaboration and version control for your projects.
Introduction To Git And Digitalocean Integration
Learn how to easily connect Git to DigitalOcean with this simple integration guide. With just a few steps, you can streamline your workflow and enjoy all the benefits of using Git with your DigitalOcean projects.
The Importance Of Version Control
Version control is crucial for tracking code changes efficiently.
It helps in collaboration, identifying bugs, and reverting to previous versions.
Why Choose Digitalocean For Deployment
DigitalOcean offers simplicity, scalability, and cost-effectiveness for deployment.
It provides a user-friendly interface and reliable infrastructure.
Prerequisites For Connecting Git To Digitalocean
Before connecting Git to DigitalOcean, ensure you have a DigitalOcean account and a Git repository. Install Git on your local machine and set up an SSH key for secure authentication. Additionally, familiarize yourself with basic Git commands for efficient version control.
Setting Up A Digitalocean Account
To connect Git to DigitalOcean, you first need to create an account on DigitalOcean. It is a simple process that requires basic information like your name, email address, and a password. Once you have registered, you need to add a payment method to enable your account. DigitalOcean offers multiple payment options like credit card, PayPal, and Apple Pay. You can choose the one that suits you best.Installing Git On Your Local Machine
To connect Git to DigitalOcean, you need to have Git installed on your local machine. Git is a version control system that allows you to track changes in your code and collaborate with other developers. Installing Git is a straightforward process that requires you to download and run the installer for your operating system. Once installed, you need to configure Git by setting your username and email address.Creating An Ssh Key
To connect Git to DigitalOcean, you need to create an SSH key. An SSH key is a secure way of authenticating yourself to a remote server. It consists of a public key that you share with the server and a private key that you keep on your local machine. To create an SSH key, you need to run a command in your terminal and follow the prompts. Once you have created the key, you need to add the public key to your DigitalOcean account.Adding Your Digitalocean Droplet As A Remote
To connect Git to DigitalOcean, you need to add your DigitalOcean droplet as a remote. A droplet is a virtual server that you can create on DigitalOcean. To add your droplet as a remote, you need to copy the droplet’s IP address and run a command in your terminal. Once added, you can push your code to the remote and deploy your application. These are the prerequisites for connecting Git to DigitalOcean. By following these steps, you can set up your DigitalOcean account, install Git on your local machine, create an SSH key, and add your DigitalOcean droplet as a remote. With these in place, you can start collaborating with other developers and deploying your applications to DigitalOcean.Generating Ssh Keys For Secure Connection
To connect Git to DigitalOcean, it’s important to generate SSH keys for a secure connection. This process involves creating a public and private key pair, adding the public key to your DigitalOcean account, and configuring your Git client to use the private key for authentication.
Generating SSH Keys for Secure Connection Creating SSH keys on your local machine To create SSH keys on your local machine, open the terminal and run the command `ssh-keygen -t rsa -b 4096 -C “[email protected]”`. This will prompt you to enter a file in which to save the key. For example, `~/.ssh/id_rsa` is the default location. Adding SSH keys to DigitalOcean To add SSH keys to DigitalOcean, start by copying the public key to your clipboard using the command `pbcopy < ~/.ssh/id_rsa.pub`. Then, navigate to the DigitalOcean control panel, click on “Settings,” and then “Security.” Next, click “Add SSH Key” and paste the public key into the provided field. Finally, give the key a relevant name and click “Add SSH Key.” By following these steps, you can easily generate and add SSH keys for a secure connection between Git and DigitalOcean.
Credit: github.com
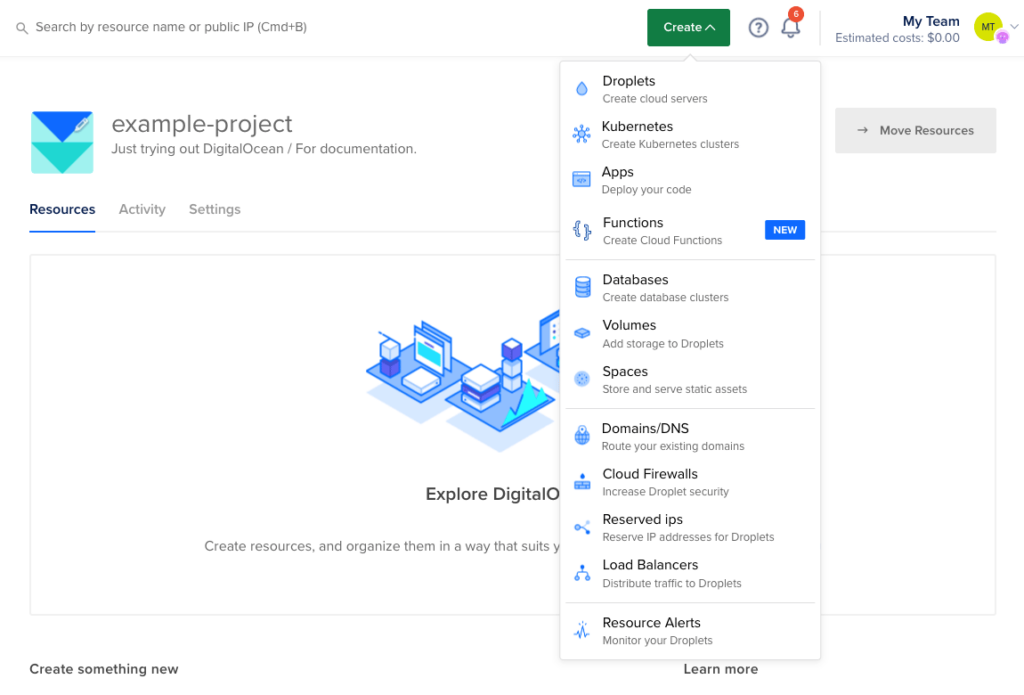
Creating A Digitalocean Droplet For Your Project
To connect Git to DigitalOcean, create a Droplet for your project. Install Git on the Droplet and configure it to link with your repository for seamless collaboration and version control. This setup streamlines development and ensures efficient code management in a cloud environment.
Selecting The Right Droplet
Before creating a DigitalOcean droplet, it is important to select the right one for your project. The droplet selection will depend on the requirements of your project, such as the amount of storage space, RAM, and CPU needed. DigitalOcean offers a wide range of droplets, including standard, optimized, and flexible droplets. You can choose the droplet that suits your project requirements.Droplet Configuration And Setup
Once you have selected the right droplet, it is time to configure and set it up. You can configure the droplet with your preferred operating system, such as Ubuntu, Debian, CentOS, or Fedora. Additionally, you can choose to install pre-configured images, such as Docker, LAMP, or Ruby on Rails. To set up your droplet, you can follow the DigitalOcean tutorial for creating a droplet. You will need to create an SSH key pair, add it to your DigitalOcean account, and then use it to connect to your droplet. You can also add a domain name to your droplet to make it accessible via the internet. In conclusion, creating a DigitalOcean droplet is an essential step for hosting your project on DigitalOcean. By selecting the right droplet and configuring it properly, you can ensure that your project runs smoothly on the cloud.Installing Git On Digitalocean Droplet
To connect Git to your DigitalOcean Droplet, follow these steps for installing Git. Begin by accessing your Droplet through SSH and then running the necessary commands to install Git. This will enable you to effectively manage your code repositories and collaborate with ease.
Accessing The Droplet Via Ssh
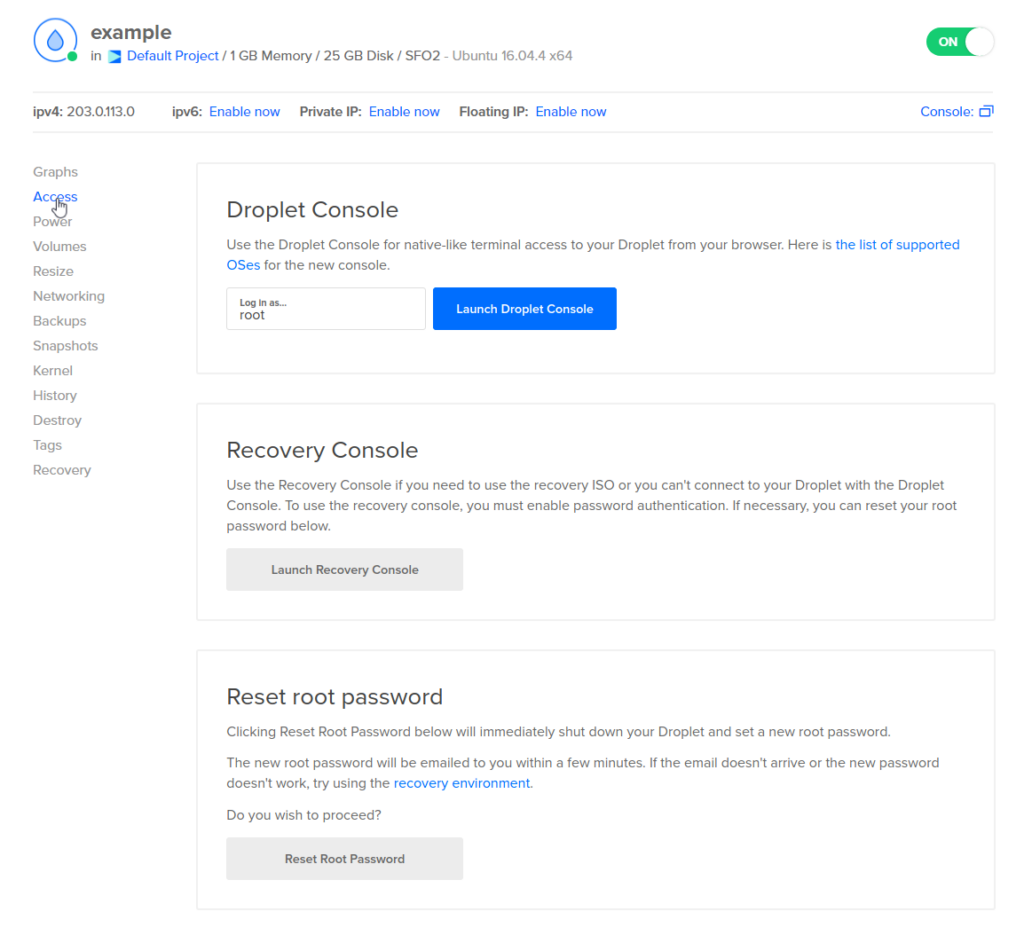
To install Git on your DigitalOcean Droplet, you first need to access the Droplet via SSH. SSH, or Secure Shell, is a secure network protocol that allows you to access and manage your remote server. To connect to your Droplet via SSH, follow these simple steps:- Open your terminal or command prompt.
- Type the following command, replacing ‘your_droplet_ip’ with the IP address of your DigitalOcean Droplet:
ssh root@your_droplet_ip - Press Enter and wait for the connection to establish.
- When prompted, enter the password for the ‘root’ user.
- Once logged in, you will have access to your Droplet’s command line interface.
Git Installation Commands
Now that you have successfully accessed your Droplet via SSH, you can proceed with installing Git. Follow the steps below:- Update the package list on your Droplet to ensure you have the latest version of Git:
sudo apt update - Install Git using the following command:
sudo apt install git - After entering the command, you will be prompted to confirm the installation. Type ‘y’ and press Enter to proceed.
- Wait for the installation to complete. Once finished, you will have Git installed on your DigitalOcean Droplet.

Credit: www.digitalocean.com
Setting Up A Git Repository On Digitalocean
Setting up a Git repository on DigitalOcean allows you to efficiently manage your code and collaborate with team members. In this guide, we’ll walk through the process of initializing a new Git repository and configuring remote repository settings.
Initializing A New Git Repository
To initialize a new Git repository on DigitalOcean, navigate to the desired directory using the command line interface and execute the following command:
git initConfiguring Remote Repository Settings
After initializing the Git repository, it’s essential to configure the remote repository settings to enable seamless collaboration and version control. Use the following commands to set the remote repository URL:
git remote add origin your_remote_repository_url
Linking Local Repository To Digitalocean
When linking your local repository to DigitalOcean, you establish a seamless connection for efficient code deployment and collaboration.
Adding Digitalocean As A Remote
To link your local repository to DigitalOcean, add DigitalOcean as a remote repository using the following Git command:
git remote add digitalocean your_digitalocean_repository_urlPushing Code From Local To Digitalocean
After adding DigitalOcean as a remote, push your code from the local repository to DigitalOcean using the command:
git push digitalocean your_branch_name

Credit: www.digitalocean.com
Automating Deployment With Git Hooks
Automating deployment with Git hooks simplifies the process of connecting Git to DigitalOcean. By leveraging Git hooks, you can seamlessly manage the deployment of your applications to DigitalOcean servers, streamlining the workflow and enhancing efficiency. This integration allows for a seamless connection between your version control system and your hosting environment, ensuring smooth and reliable deployment processes.
Understanding Git Hooks
Creating Post-receive Hooks For Automation
Automating Deployment with Git Hooks streamlines the process of updating your DigitalOcean server. Git hooks are scripts that run automatically on specific events, such as pushing code to a repository. Understanding Git hooks allows for efficient deployment workflows.
Post-receive hooks can automate tasks after code is received, such as deploying changes to a live website. By creating these hooks, you can ensure seamless automation of deployment processes, enhancing efficiency and consistency.
Best Practices For Git And Digitalocean Workflow
Regular Commits And Pushes
Make frequent commits and pushes to avoid data loss.
Managing Branches For Different Environments
Use branches for various environments to ensure smooth workflow.
Troubleshooting Common Issues
Troubleshooting common issues when connecting Git to DigitalOcean is crucial for seamless development workflows.
Ssh Connection Problems
Check SSH key permissions. Verify key is added to DigitalOcean. Run ssh -vT [email protected].
Git Push And Pull Errors
Verify remote URL with git remote -v. Ensure correct credentials are stored.
Advanced Tips For Power Users
Setting Up Continuous Integration/continuous Deployment (ci/cd)
Integrating Git with DigitalOcean for continuous integration and continuous deployment (CI/CD) is a powerful way to streamline your development workflow. By automating the build, test, and deployment processes, you can ensure that your code is always up-to-date and ready for production.
Using Containerization With Docker
Containerization with Docker allows you to package your applications and their dependencies into standardized units, providing a consistent environment for development, testing, and deployment. By leveraging Docker with Git and DigitalOcean, you can easily manage and scale your applications in a highly efficient manner.
Conclusion: Maximizing Productivity With Git And Digitalocean
By connecting Git to DigitalOcean, you can streamline your development workflow and significantly enhance your productivity. In this blog post, we have covered the step-by-step process of setting up the integration and highlighted future considerations for scaling your projects. Let’s quickly recap the steps and explore some key aspects to keep in mind.
Recap Of Steps
- Create a new droplet on DigitalOcean and configure SSH access
- Generate an SSH key on your local machine and add it to the DigitalOcean droplet
- Create a new repository on Git and clone it to your local machine
- Set up the remote origin for your Git repository to point to the DigitalOcean droplet
- Push your local changes to the remote repository on DigitalOcean
Following these steps ensures a seamless connection between Git and DigitalOcean, enabling you to easily manage and deploy your code.
Future Considerations For Scaling
As your projects grow, it’s important to consider scalability and optimize your workflow accordingly. Here are a few key aspects to keep in mind:
- Branching Strategy: Adopting a well-defined branching strategy, such as GitFlow, can help manage feature development and hotfixes efficiently.
- Continuous Integration/Deployment: Implementing CI/CD pipelines automates the build, testing, and deployment process, reducing manual effort and ensuring a smooth release cycle.
- Infrastructure as Code: Utilizing tools like Terraform or Ansible to define your infrastructure as code allows for reproducibility and scalability, making it easier to manage resources on DigitalOcean.
- Monitoring and Logging: Implementing robust monitoring and logging solutions helps identify performance bottlenecks, errors, and security issues in real-time, enabling proactive remediation.
By considering these aspects, you can optimize your development process and scale your projects effectively, leveraging the power of Git and DigitalOcean.
Frequently Asked Questions
How To Connect Github To Digitalocean?
To connect GitHub to DigitalOcean, follow these steps: 1. Generate an SSH key pair on your local machine. 2. Add the public key to your GitHub account. 3. Create a new Droplet on DigitalOcean. 4. Copy the Droplet’s IP address.
5. SSH into the Droplet using the IP address and your private key. That’s it! You have successfully connected GitHub to DigitalOcean.
How To Use Git Digital Ocean?
To use Git on DigitalOcean, follow these steps: 1. Create a Droplet on DigitalOcean. 2. Connect to your Droplet via SSH. 3. Install Git on the Droplet by running the appropriate commands. 4. Initialize a Git repository in your desired directory.
5. Use Git commands like git add, git commit, and git push to manage your code.
How To Connect Git To Server?
To connect Git to a server, use SSH key authentication for secure access. Add the server’s SSH key to your Git account. Then, configure the remote repository URL to use the SSH protocol. Lastly, push your code to the server using the Git push command.
How To Connect To Git On Linux?
To connect to Git on Linux, follow these steps: 1. Open the terminal. 2. Navigate to the directory where you want to initialize the Git repository. 3. Run the command “git init” to initialize the repository. 4. Set up your username and email using “git config –global user.
name” and “git config –global user. email”. 5. You can now start using Git on Linux.
Conclusion
Incorporating Git with DigitalOcean streamlines your development process and enhances collaboration. By following the simple steps outlined in this guide, you can seamlessly connect Git to DigitalOcean and take advantage of version control and deployment features. Embracing these technologies will empower your team to work more efficiently and effectively.
Start integrating Git with DigitalOcean today to elevate your development workflow.

