
To FTP into your DigitalOcean droplet, use an FTP client like FileZilla. First, open FileZilla and go to File -> Site Manager.
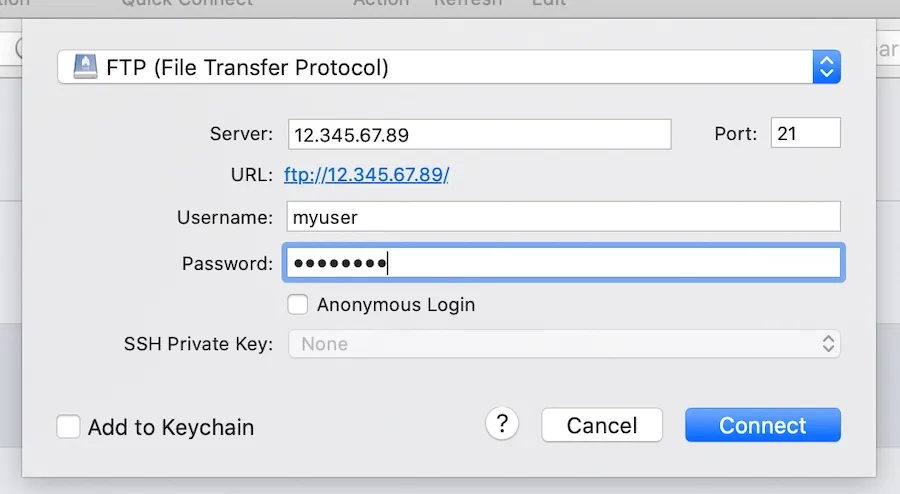
Click on “New Site” and enter a name for your droplet. In the Host field, enter your droplet’s IP address. Choose “FTP – File Transfer Protocol” as the protocol, and select “Use explicit FTP over TLS if available” for encryption.
Set the Logon Type to “Normal” and enter your droplet’s username and password. Finally, click on “Connect” to establish an FTP connection with your DigitalOcean droplet.
Introduction To Ftp And Digitalocean Droplets
FTP is a popular method for accessing and transferring files to a DigitalOcean Droplet. Learn how to FTP into your DigitalOcean Droplet effortlessly and efficiently with this comprehensive guide. Discover the step-by-step process and get started with ease.
What Is Ftp?
FTP stands for File Transfer Protocol, a standard network protocol used to transfer files from one host to another over a network. It is commonly used to upload files from a local computer to a remote server.Benefits Of Using Ftp With Digitalocean Droplets
FTP allows for efficient file management between your local machine and DigitalOcean Droplets. It enables secure file transfers and easy access to your server files. FTP helps streamline workflow by providing a user-friendly interface for uploading and downloading files. It also supports large file transfers and maintains file integrity during the process.Prerequisites For Ftp Access
Before you can FTP into your DigitalOcean Droplet, you need to have a few prerequisites in place. This includes a Droplet with an operating system, a user account with sudo privileges, and an FTP client installed on your local computer.
Before you can FTP into your DigitalOcean Droplet, there are a few prerequisites that need to be met.Setting Up A Digitalocean Droplet
To set up a DigitalOcean Droplet, follow these steps:- Create a DigitalOcean account and log in.
- Click on the “Create” button and select “Droplets.”
- Choose your desired operating system and plan.
- Choose your desired data center region.
- Select additional options, if desired.
- Choose a hostname and click on the “Create” button.
Securing Your Droplet
Before FTPing into your Droplet, it’s important to secure it. Here are some steps you can take:- Update your operating system and software regularly.
- Use strong passwords and avoid using the root account.
- Configure a firewall to block unwanted traffic.
- Disable unused services and ports.
Choosing The Right Ftp Client
When it comes to managing your DigitalOcean Droplet, choosing the right FTP client is crucial for seamless file transfers. With a plethora of options available, selecting the most suitable FTP client can streamline your workflow and enhance your overall experience. Let’s explore the popular FTP clients and compare them for DigitalOcean.
Popular Ftp Clients
Before diving into FTP client comparisons, it’s essential to understand the popular options available. FileZilla, Cyberduck, and WinSCP are among the widely-used FTP clients known for their user-friendly interfaces and robust features.
Comparing Ftp Clients For Digitalocean
When it comes to connecting to your DigitalOcean Droplet via FTP, it’s crucial to evaluate the available options. Here’s a comparison of some popular FTP clients:
| FTP Client | Supported Platforms | Features |
|---|---|---|
| FileZilla | Windows, macOS, Linux | Drag-and-drop functionality, synchronized directory browsing, site manager for easy server management |
| Cyberduck | Windows, macOS | Integration with external editors, support for various protocols including FTP, SFTP, WebDAV, and more |
| WinSCP | Windows | Integration with PuTTY, scripting and task automation, powerful file manager |
Installing And Configuring An Ftp Server
To FTP into your DigitalOcean Droplet, start by installing and configuring an FTP server on your system. Once set up, use an FTP client to connect to your Droplet using the assigned IP address and login credentials. This allows for seamless file transfers and management on your server.
Ftp Server Options
Before installing and configuring an FTP server, you need to choose the right FTP server option for your DigitalOcean Droplet. There are several FTP server options available, including vsftpd, PureFTPd, and ProFTPD. Each option has its own strengths and weaknesses, so it’s important to choose the one that meets your specific needs.Step-by-step Installation Guide
Once you have chosen the FTP server option that’s right for your Droplet, it’s time to install and configure the server. Follow these simple steps to get started:- Log in to your DigitalOcean Droplet using SSH.
- Update the package index and install the FTP server package using the following command:
sudo apt-get update
sudo apt-get install vsftpd- Configure the FTP server by editing the configuration file using the following command:
sudo nano /etc/vsftpd.conf- Make the necessary changes to the configuration file, such as enabling anonymous access or setting up user accounts.
- Save and exit the configuration file.
- Restart the FTP server using the following command:
sudo service vsftpd restartCreating Ftp Users And Permissions
Learn how to create FTP users and set permissions to securely FTP into your DigitalOcean Droplet. Easily transfer files between your local computer and your server with this simple step-by-step guide.
Creating FTP Users and Permissions In order to securely FTP into your DigitalOcean Droplet, you need to create FTP users and manage their permissions. This allows you to control who has access to your server and what actions they can perform. In this section, we will walk you through the process of creating FTP user accounts and setting up their permissions.User Account Creation
To create a new FTP user account, follow these steps: 1. Log in to your DigitalOcean Droplet using your preferred SSH client. 2. Once logged in, navigate to the terminal and enter the following command to create a new user account: “` sudo adduser username “` Replace “username” with the desired username for your FTP user. 3. You will be prompted to enter a password for the new user. Make sure to choose a strong password and confirm it when prompted. 4. After setting the password, you will be asked to provide additional information for the user. You can either fill in the details or leave them blank by pressing Enter. Congratulations! You have successfully created a new FTP user account on your DigitalOcean Droplet.Managing User Permissions
Once you have created the FTP user account, it’s important to manage their permissions to ensure the security of your server. Here’s how you can do it: 1. Log in to your Droplet using SSH. 2. Navigate to the terminal and enter the following command to grant the necessary permissions to the FTP user: “` sudo usermod -aG sudo username “` Replace “username” with the actual username of the FTP user. 3. Next, you need to set the appropriate file and directory permissions for the FTP user. You can use the following commands as examples: “` sudo chown -R username:username /path/to/directory sudo chmod -R 755 /path/to/directory “` Replace “/path/to/directory” with the actual path to the directory you want to set permissions for. By following these steps, you can create FTP user accounts and manage their permissions on your DigitalOcean Droplet. This allows you to control access to your server and ensure the security of your data.Connecting To Your Droplet Via Ftp
Connecting to Your Droplet via FTP is a straightforward process that allows you to transfer files between your local system and your DigitalOcean Droplet. By following the simple steps outlined below, you can easily establish an FTP connection and manage your server’s files efficiently.
Finding Your Droplet’s Ip Address
Locating your Droplet’s IP address is the initial step in establishing an FTP connection. To find this information, log in to your DigitalOcean account and navigate to the Droplets section. Here, you can view the IP address of your Droplet, which will be used to initiate the FTP connection.
Entering Connection Details In Ftp Client
After obtaining your Droplet’s IP address, you need to enter the connection details in your FTP client. Open your preferred FTP client and navigate to the connection settings. Enter the Droplet’s IP address in the designated field and provide your username and password to establish the connection.
File Management With Ftp
FTP (File Transfer Protocol) is a popular method for managing files on your DigitalOcean Droplet. With FTP, you can easily upload and download files to and from your server.
Uploading Files To Your Droplet
To upload files to your Droplet using FTP, follow these steps:
- Connect to your Droplet using an FTP client.
- Navigate to the directory where you want to upload the files.
- Select the files on your local machine to upload.
- Drag and drop the files to the remote directory in the FTP client.
- Wait for the upload to complete.
Downloading Files From Your Droplet
To download files from your Droplet using FTP, here’s what you need to do:
- Connect to your Droplet via FTP.
- Navigate to the directory containing the files you want to download.
- Select the files you wish to download.
- Drag and drop the files to your local machine in the FTP client.
- Wait for the download to finish.
Troubleshooting Common Ftp Issues
Connection Problems
Unable to connect to the server? Ensure the hostname and port are correct.
- Check firewall settings
- Verify FTP service is running
Permission Denied Errors
Encountering permission errors? Confirm user has proper access rights.
- Check file permissions
- Ensure correct username and password
Best Practices For Ftp On Digitalocean
Securing Ftp Connections
Use secure FTP protocols like SFTP or FTPS.
Limit FTP access to specific IP addresses.
Regularly scan for malware on your Droplet.
Regularly Updating Ftp Credentials
Change FTP passwords frequently.
Use strong, unique passwords for each FTP user.
Implement two-factor authentication for added security.
Credit: macarthur.me
Alternatives To Ftp For File Transfer
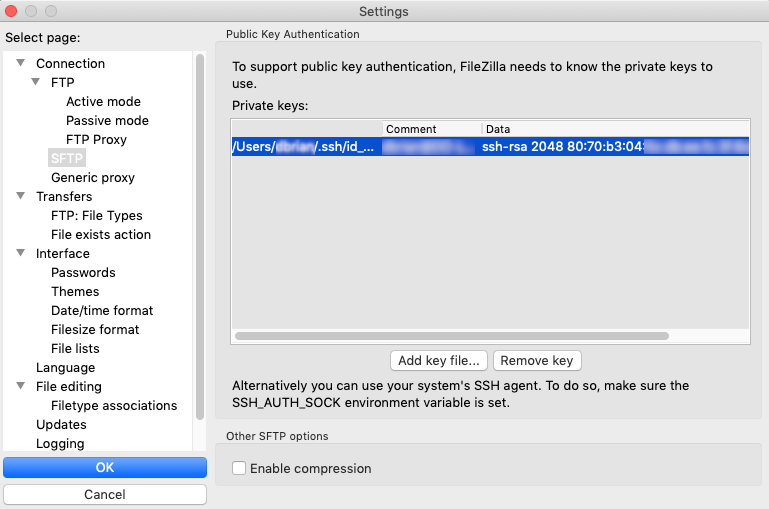
Explore alternative file transfer methods like SFTP or SCP for secure access to your DigitalOcean Droplet. Set up SSH keys for seamless and reliable remote file transfers without the need for traditional FTP protocols.
Using Sftp For Secure Transfers
Secure File Transfer Protocol (SFTP) is a secure alternative to FTP, providing encrypted file transfers.
Other File Transfer Protocols
Various file transfer protocols like SCP, Rsync, and WebDAV offer secure and efficient file transfer options.
Conclusion: Streamlining Your Workflow With Ftp
Summarizing The Benefits Of Ftp
FTP provides a secure and efficient way to transfer files between your local computer and your DigitalOcean Droplet. It simplifies the process of managing your website’s files, saving you time and effort. With FTP, you can easily upload, download, and organize your files, enhancing your productivity and workflow.
Further Resources And Support
For further assistance with FTP and managing your DigitalOcean Droplet, there are numerous resources and support channels available. DigitalOcean’s comprehensive documentation, community forums, and customer support are valuable sources of information. Additionally, online tutorials and forums can provide insights and solutions to optimize your FTP experience.

Credit: forum.freecodecamp.org

Credit: docs.digitalocean.com
Frequently Asked Questions
How To Connect To Digitalocean Droplet Via Ftp?
To connect to your DigitalOcean droplet via FTP, follow these steps: 1. Install an FTP client like FileZilla or Cyberduck on your local machine. 2. Open the FTP client and enter your droplet’s IP address, username, and password. 3. Set the port to 22 for SFTP or port 21 for FTP.
4. Click connect, and you’ll be connected to your droplet via FTP.
How To Upload Files To Digitalocean Droplet?
To upload files to DigitalOcean droplet, use an FTP client like FileZilla. Enter the droplet’s IP, username, and password to connect. Then, drag and drop files to transfer them.
How To Transfer Droplets In Digitalocean?
To transfer droplets in DigitalOcean, follow these steps: 1. Log in to your DigitalOcean account. 2. Navigate to the Droplets section. 3. Select the droplet you want to transfer. 4. Click on the “More” option and choose “Transfer Droplet. ” 5.
Enter the email address of the recipient and confirm the transfer.
How Do I Connect My Digitalocean Droplet?
To connect your DigitalOcean droplet, follow these steps: 1. Log in to your DigitalOcean account. 2. Navigate to the Droplets section. 3. Click on the droplet you want to connect. 4. Copy the droplet’s IP address. 5. Use an SSH client to connect to the droplet using the IP address.
Conclusion
FTP’ing into your DigitalOcean droplet is a straightforward process that can greatly enhance your server management capabilities. By following the steps outlined in this guide, you can securely and efficiently transfer files to and from your droplet. Embracing FTP can streamline your workflow and empower you to make the most of your server resources.


