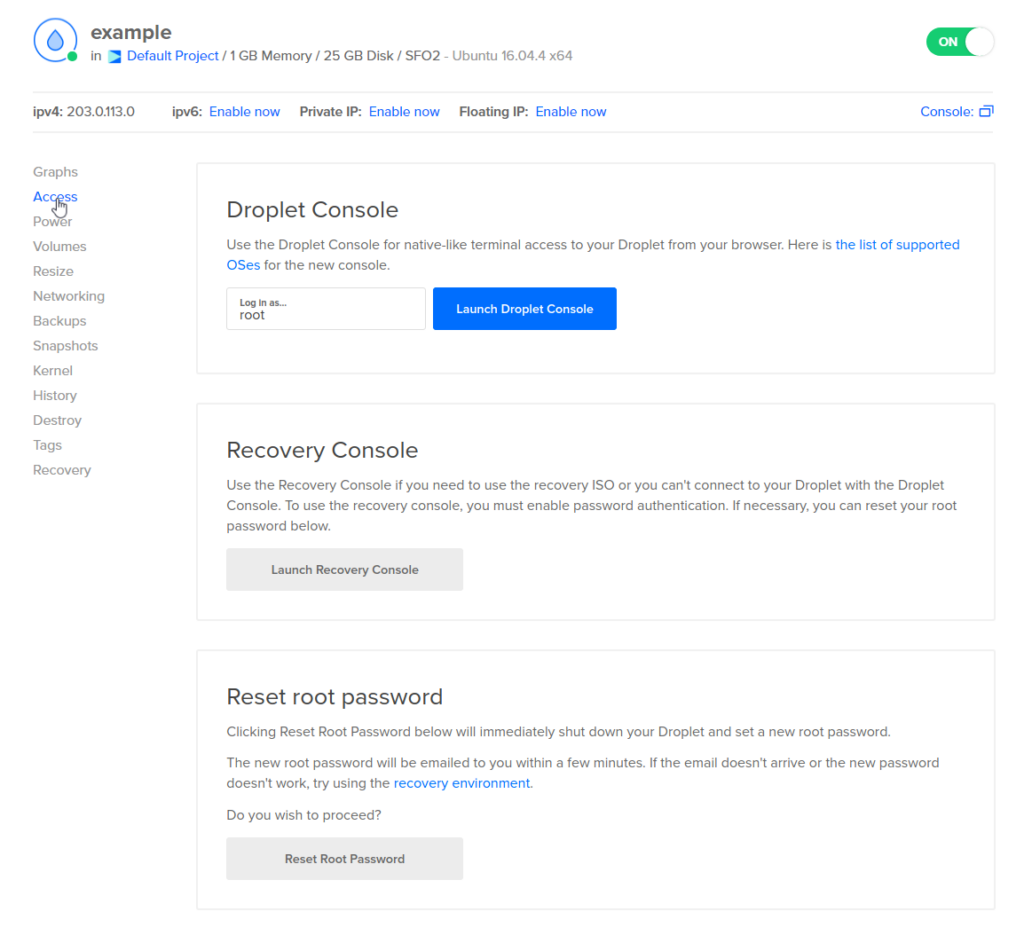
To install MySQL on CentOS DigitalOcean, follow these steps: First, update the system with the command “sudo yum update.” Then, install MySQL with the command “sudo yum install mysql-server.”

Credit: www.digitalocean.com
Introduction To Mysql On Centos
Importance Of Mysql
MySQL is a crucial component of web development as it serves as a powerful and reliable open-source database management system. It is widely used for managing and storing data for websites and applications.
Advantages Of Centos For Mysql
CentOS, being a popular Linux distribution, is known for its stability, security, and long-term support. It provides a robust platform for hosting MySQL, ensuring optimal performance and reliability.
Prerequisites For Installation
Before installing MySQL on CentOS, you need to ensure that your server meets certain prerequisites to ensure a smooth installation process.
Centos Version Requirements
Ensure that you are running a supported version of CentOS. As of this writing, CentOS 7 and CentOS 8 are the latest stable versions. Check the official CentOS documentation for the most up-to-date information on supported versions.
Securing Your Centos Server
Prior to installing MySQL, it’s crucial to secure your CentOS server. This involves configuring the firewall to allow access to the MySQL port, creating a new user with sudo privileges, and disabling root login. Additionally, make sure to update the system and install necessary security updates.
Setting Up The Repository
If you are looking to install MySQL on your CentOS DigitalOcean server, you’ll need to set up the MySQL Yum repository. This repository will allow you to download and install the necessary packages to get MySQL up and running on your server. Here’s how to set up the repository.
Adding The Mysql Yum Repository
To add the MySQL Yum repository, you’ll need to use the wget command to download the repository package:
wget https://dev.mysql.com/get/mysql80-community-release-el7-1.noarch.rpmOnce the package is downloaded, you can install it using the following command:
sudo rpm -ivh mysql80-community-release-el7-1.noarch.rpmThis will add the MySQL Yum repository to your server.
Repository Configuration Options
After adding the MySQL Yum repository, you’ll want to configure it to ensure that you are downloading the correct packages. To do this, you can edit the repository configuration file at /etc/yum.repos.d/mysql-community.repo.
Within this file, you’ll find several configuration options that you can adjust, including:
| Option | Description |
|---|---|
enabled |
Set to 1 to enable the repository, or 0 to disable it. |
gpgcheck |
Set to 1 to enable GPG signature checking, or 0 to disable it. |
gpgkey |
The URL or file path to the GPG key used to sign the repository metadata. |
By default, the repository is enabled and GPG signature checking is enabled. You can leave these settings as-is if you prefer.
Once you’ve configured the repository to your liking, you can save the file and exit. You’re now ready to install MySQL on your CentOS DigitalOcean server!
Installing Mysql
The process of installing MySQL on CentOS is relatively straightforward and can be completed in a few simple steps. In this guide, we will walk you through the process of installing MySQL on CentOS DigitalOcean. Let’s dive in!
Executing The Install Command
The first step to installing MySQL on CentOS is to execute the install command. The install command can be executed using the yum package manager. The command is as follows:
sudo yum install mysql-serverOnce executed, the package manager will prompt you to confirm the installation by typing ‘Y’ and pressing enter. After confirmation, the package manager will begin downloading the necessary files.
Resolving Dependencies
During the installation process, you may encounter dependency errors. Dependencies are additional software packages that must be installed to ensure the correct functioning of the software. In the case of MySQL, dependencies may include libraries and other software packages.
To resolve these dependencies, you can use the following command:
sudo yum install -y mysql-serverThe -y flag ensures that all dependencies are installed automatically without the need for user input.
After executing this command, the package manager will begin downloading and installing the necessary dependencies. Once the dependencies have been installed, the MySQL installation process will resume.
With these simple steps, you can easily install MySQL on CentOS DigitalOcean. Happy coding!
Securing Mysql Post-installation
After successfully installing MySQL on CentOS DigitalOcean, it is crucial to secure it post-installation. This ensures that your database remains protected from potential security threats and unauthorized access. Taking the necessary steps to secure MySQL will safeguard your data and maintain the integrity of your system.
After successfully installing MySQL on your CentOS DigitalOcean server, it is crucial to take steps to secure your installation to protect your data and prevent unauthorized access. This section will guide you through the process of securing MySQL post-installation.
Running The Security Script
To enhance the security of your MySQL installation, you can run the security script included with MySQL. This script will prompt you with a series of questions to configure the security options for your MySQL server.
To run the security script, open the terminal and enter the following command:
sudo mysql_secure_installationThis command will launch the security script and guide you through the configuration process. The script will prompt you to:
- Enter the current root password (if one exists) or set a new one
- Remove anonymous users
- Disallow remote root login
- Remove the test database and access to it
- Reload privilege tables to apply the changes
By following these steps, you can enhance the security of your MySQL installation and reduce the risk of unauthorized access.
Setting Root Password
One of the essential steps in securing your MySQL installation is setting a strong password for the root user. The root user has full administrative privileges, so it is crucial to protect this account with a robust password.
To set or change the root password, follow these steps:
- Open the terminal and enter the following command to log in to MySQL as the root user:
sudo mysql -u root -p- Enter the current root password or leave it blank if you haven’t set one yet.
- Once logged in, execute the following command to change the root password:
ALTER USER 'root'@'localhost' IDENTIFIED BY 'new_password';Replace new_password with your desired strong password. Make sure to choose a password that is difficult to guess and includes a combination of uppercase and lowercase letters, numbers, and special characters.
After changing the root password, you will need to reload the privilege tables for the changes to take effect. Use the following command to reload the tables:
FLUSH PRIVILEGES;With a strong root password in place, you have significantly increased the security of your MySQL installation.

Credit: www.digitalocean.com
Starting And Enabling Mysql Services
Starting and enabling MySQL services is a crucial step after installing MySQL on your CentOS DigitalOcean server. This ensures that the database management system is up and running, and will start automatically every time the server reboots.
Using Systemctl To Manage Mysql Service
Systemctl is a command-line utility for controlling the systemd system and service manager, and it is used to start, stop, enable, disable, and manage services in CentOS. To start the MySQL service using systemctl, use the following command:
To stop the MySQL service, use:
And to check the status of the MySQL service, you can use:
Configuring Mysql To Start On Boot
To ensure that MySQL starts automatically when the server boots up, you can use the systemctl enable command:
This will create the necessary symlinks for the MySQL service, allowing it to start on boot.
Verifying The Mysql Installation
After installing MySQL on CentOS DigitalOcean, it is essential to verify the installation to ensure it was successful.
Checking The Mysql Service Status
To check the MySQL service status on your CentOS server, use the following command:
sudo systemctl status mysqldTesting Mysql Connectivity
To test MySQL connectivity, follow these steps:
- Open the MySQL command line by entering:
mysql -u root -p - Enter your MySQL root password when prompted.
- If you can successfully log in, MySQL is properly installed and running.
Basic Mysql Configuration
Basic MySQL Configuration is essential for optimal database performance on CentOS DigitalOcean.
Editing The My.cnf File
Modify the my.cnf file to adjust MySQL settings.
Optimizing Mysql Performance Settings
Enhance MySQL performance by adjusting key configuration settings.
Creating A New Database And User
To install MySQL on Centos DigitalOcean, you need to create a new database and user. This can be done by logging in to the MySQL server as the root user, creating a new database, and then creating a new user with the necessary permissions to access the database.
It’s a simple process that can be done in just a few steps.
Creating a new database and user in MySQL on CentOS DigitalOcean is essential for managing your data securely and efficiently.Accessing Mysql Prompt
To access the MySQL prompt, open the terminal and type:mysql -u root -p
– Enter the MySQL root password to log in successfully.
Granting User Permissions
Grant permissions to a user for a specific database with the command:GRANT ALL PRIVILEGES ON database_name. TO 'username'@'localhost' IDENTIFIED BY 'password';
– Replace ‘database_name’, ‘username’, and ‘password’ with your desired values.
– Execute FLUSH PRIVILEGES; to apply the changes immediately.
Troubleshooting Common Installation Issues
Install Mysql on Centos Digitalocean may encounter some common installation issues such as permission errors, missing dependencies, or incorrect configurations. Troubleshooting these issues requires careful attention to detail, verifying the installation steps, and ensuring that all dependencies are met.
Dealing With Firewall Restrictions
If you encounter connectivity issues, check the firewall settings. Adjust firewall rules to allow MySQL traffic. Use the following command to open port 3306: “`bash sudo firewall-cmd –zone=public –add-port=3306/tcp –permanent “` Reload the firewall for changes to take effect: “`bash sudo firewall-cmd –reload “`Resolving Mysql Service Failures
In case of MySQL service failures, restart the service. Use the command below to restart MySQL: “`bash sudo systemctl restart mysqld “` Check the status of MySQL service: “`bash sudo systemctl status mysqld “` Ensure MySQL service is active and running smoothly. If issues persist, review MySQL error logs.Advanced Tips And Tricks
When it comes to using MySQL on your CentOS DigitalOcean server, there are a few advanced tips and tricks that can enhance your experience and improve the performance and security of your database. In this section, we will explore some advanced techniques for managing your MySQL installation.
Enabling Remote Mysql Access
If you need to access your MySQL database from a remote location, you will need to configure your MySQL server to allow remote connections. To do this, you will need to modify the MySQL server’s configuration file. Locate the my.cnf file in the /etc directory and open it in a text editor. Look for the bind-address parameter and change its value to 0.0.0.0 to allow connections from any IP address. Save the file and restart the MySQL service to apply the changes. Keep in mind the security implications of enabling remote access and consider implementing additional security measures such as IP whitelisting and VPN connections.
Setting Up Automated Backups
Automated backups are essential for protecting your MySQL database from data loss. To set up automated backups, you can use a tool like mysqldump to export your database to a backup file, and then use a cron job to schedule regular backups. Additionally, you may want to consider using cloud storage services or dedicated backup solutions to store your backups off-site for added redundancy. Regularly test your backup and restore procedures to ensure that your backups are reliable and can be restored in the event of a data loss.
Credit: www.linode.com
Frequently Asked Questions
How To Install Mysql On Centos 8 Digitalocean?
To install MySQL on CentOS 8 DigitalOcean, use the package manager to download and install MySQL. Start by updating the system, adding the MySQL repository, and then installing the MySQL server and client packages. Finally, secure the installation and start the MySQL service.
How Do I Install Mysql In Centos?
To install MySQL in CentOS, use the command “sudo yum install mysql-server” in the terminal. Then, start the MySQL service and set it to launch at boot with “sudo systemctl start mysqld” and “sudo systemctl enable mysqld”.
How To Setup Mysql On Digitalocean?
To set up MySQL on DigitalOcean, follow these steps: 1. Create a Droplet on DigitalOcean. 2. Access your Droplet via SSH. 3. Install MySQL by running the necessary commands. 4. Configure MySQL by updating the bind-address and other settings. 5. Secure MySQL by creating a root password and removing anonymous users.
How To Install Mysql In Centos 8 Stream?
To install MySQL in CentOS 8 Stream, use the command “sudo dnf install @mysql” in the terminal.
Conclusion
To sum up, installing MySQL on CentOS on DigitalOcean is a crucial task for many users. By following these steps, you can successfully set up MySQL for your projects. Remember to regularly update and maintain your MySQL installation to ensure optimal performance and security.
Happy coding!

