To install WordPress on DigitalOcean, follow these steps: create a droplet, choose the desired configuration, select the WordPress image, and configure the droplet. If you’re looking to host your website using WordPress on DigitalOcean, the process is simple and straightforward.
By following a few steps, you can have your WordPress site up and running in no time. In this guide, we will walk you through the process of installing WordPress on DigitalOcean. So, let’s get started and have your website live on the internet in a matter of minutes.
Introduction To WordPress On Digitalocean
Discover how to easily install WordPress on DigitalOcean with our simple step-by-step guide. Setting up WordPress on DigitalOcean is a breeze, allowing you to create a powerful and customizable website in no time.
WordPress is a popular content management system used by millions of websites worldwide. Installing WordPress on DigitalOcean provides a flexible and scalable hosting solution.
Benefits Of Using WordPress
- Easy to use and customizable
- Wide range of plugins and themes
- Great for SEO and mobile-friendly
Why Choose Digitalocean For WordPress Hosting
- Simple setup and one-click installations
- High-performance servers and SSD storage
- Scalable infrastructure for growing websites

Credit: www.digitalocean.com
Prerequisites For WordPress Installation
Installing WordPress on DigitalOcean requires a few prerequisites. These include having a domain name, a server or VPS, and an SSH client. Once you have these elements in place, you can proceed with the installation process.
Registering A Digitalocean Account
To install WordPress on DigitalOcean, you first need to register for a DigitalOcean account. This can be done by visiting their website and clicking on the “Sign Up” button. You will then be required to enter your email address, create a password and provide your billing information. Once the registration process is complete, you can proceed to the next step of setting up your domain name.Setting Up A Domain Name
To set up a domain name, you need to purchase one from a domain registrar such as Namecheap or GoDaddy. Once you have purchased a domain name, you need to configure it to point to your DigitalOcean server. This is done by updating the DNS records of your domain registrar to reflect the IP address of your DigitalOcean server. You can find your server’s IP address by logging into your DigitalOcean account and navigating to the “Droplets” section.Securing An Ssl Certificate
To secure your WordPress website and protect it from malicious attacks, it is recommended that you install an SSL certificate. An SSL certificate encrypts the communication between your website and the user’s browser, ensuring that sensitive data such as login credentials and credit card information cannot be intercepted by hackers. You can easily install an SSL certificate on your DigitalOcean server by using tools such as Let’s Encrypt or Certbot. In conclusion, by completing these prerequisites, you will be ready to install WordPress on DigitalOcean and start building your website. Remember to keep your website secure by regularly updating your WordPress installation and plugins, as well as implementing other security measures such as strong passwords and two-factor authentication.Creating A Droplet For WordPress
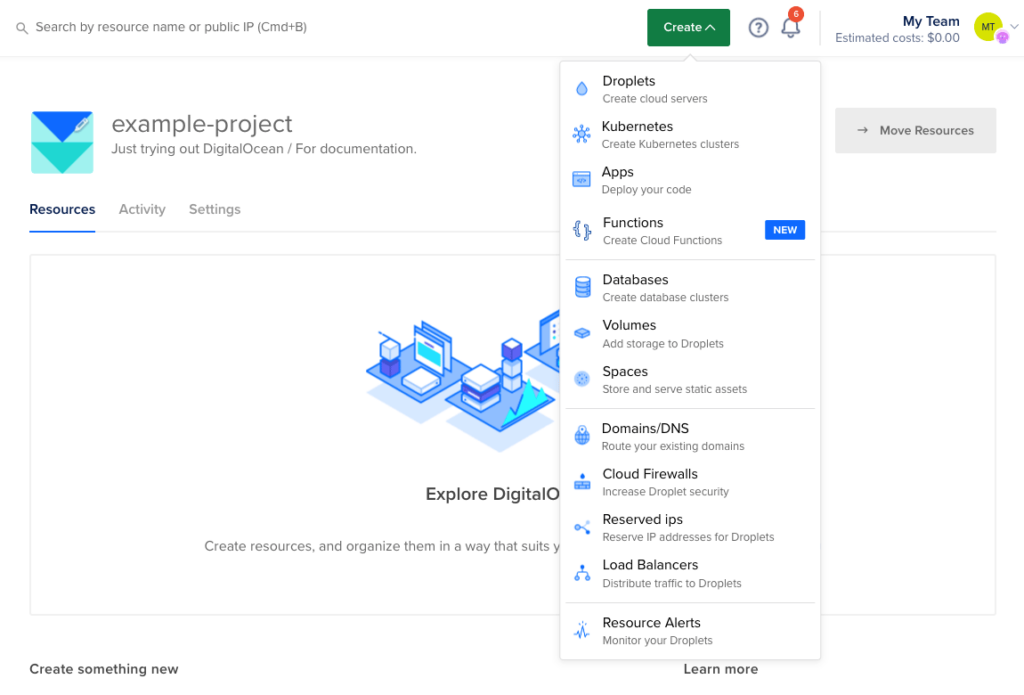
When setting up a WordPress website on DigitalOcean, creating a droplet is the first step. This involves selecting the appropriate droplet size, choosing the WordPress image, and configuring the necessary settings.
Choosing The Right Droplet Size
When creating a droplet for WordPress, it’s crucial to choose the right size to ensure optimal performance. Select a size based on the expected traffic and resource requirements of the website.
Selecting An Image For WordPress
When setting up the droplet, select the WordPress image from the marketplace. This image comes pre-installed with the necessary software, enabling a seamless WordPress installation process.
Configuring Droplet Settings
After choosing the image, configure the droplet settings, including the hostname, region, authentication method, and any additional options required for the WordPress installation.
Accessing Your Droplet Via Ssh
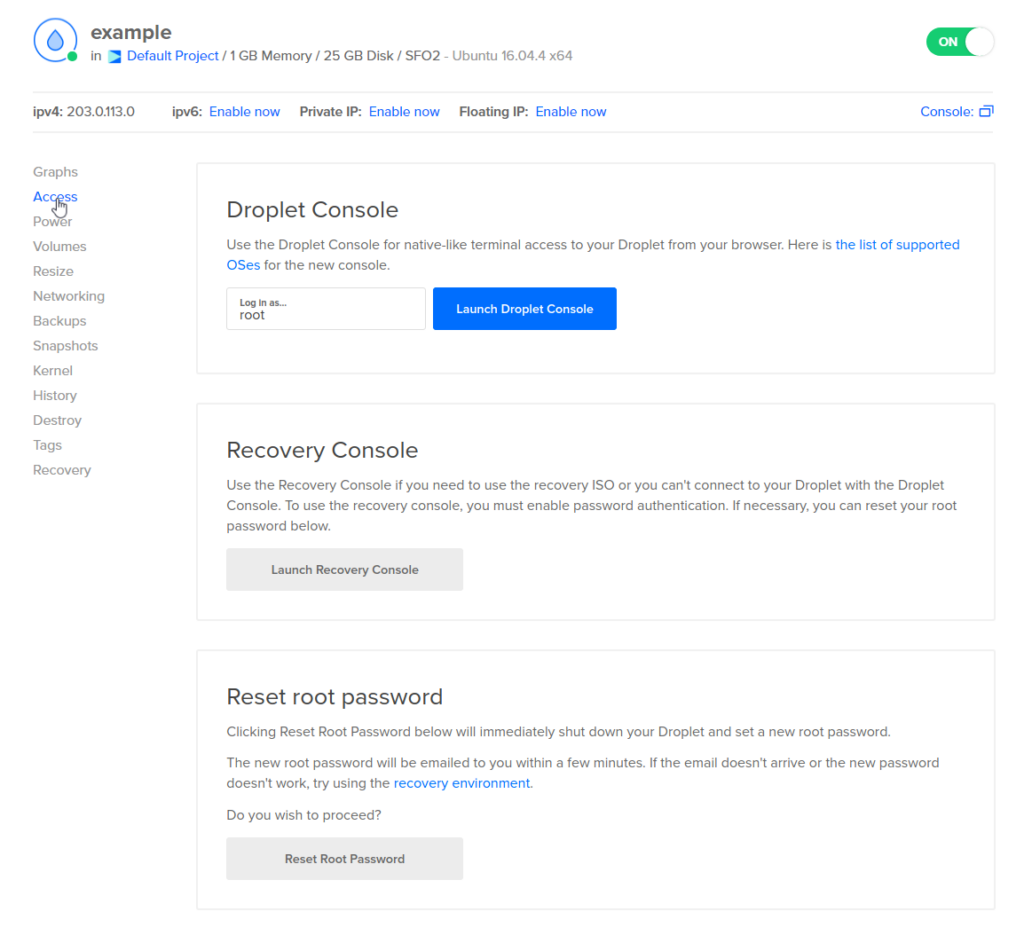
To install WordPress on DigitalOcean, you need to access your Droplet via SSH. This involves generating an SSH key pair, adding the public key to your Droplet, and then using a terminal application to connect to the Droplet. Once connected, you can install WordPress using a variety of methods, including the command line, web-based tools, or third-party applications.
Generating Ssh Keys
To access your DigitalOcean droplet via SSH, you need to generate SSH keys. SSH (Secure Shell) keys are a secure way to authenticate your connection to the server. Here are the steps to generate SSH keys:- Open your Terminal or Command Prompt.
- Type in the command
ssh-keygenand press enter. - Enter a name for your key pair when prompted and press enter.
- Enter a passphrase for your key pair when prompted and press enter. This is optional but highly recommended for added security.
- Your SSH keys have now been generated and saved to your computer.
Connecting To Your Droplet
Now that your SSH keys are generated, you can connect to your DigitalOcean droplet using the following steps:- Open your Terminal or Command Prompt.
- Type in the command
ssh root@your_droplet_ip_addressand press enter. - You will be prompted to enter your SSH key passphrase (if you set one up). Enter it and press enter.
- You are now connected to your DigitalOcean droplet via SSH!
Installing The WordPress Stack
When it comes to setting up your WordPress website, one of the most crucial steps is installing the WordPress stack. This involves updating server packages, installing the LAMP/LEMP stack, and securing MySQL while creating a database for WordPress. In this guide, we will walk you through each step, ensuring a smooth and secure installation process.
Updating Server Packages
Before you begin installing the WordPress stack, it is essential to update your server packages. This ensures that you have the latest software versions and security patches. To update your server packages, follow these steps:
- Connect to your server via SSH using a terminal application or a client like PuTTY.
- Once connected, run the following command to update the package lists:
sudo apt-get updateThis command fetches the latest package information from the Ubuntu repositories.
- Next, run the following command to upgrade the installed packages:
sudo apt-get upgradeThis command upgrades all the installed packages to their latest versions.
Installing The Lamp/lemp Stack
The next step in installing the WordPress stack is setting up the LAMP (Linux, Apache, MySQL, PHP) or LEMP (Linux, Nginx, MySQL, PHP) stack. This stack provides the necessary components to run WordPress smoothly. Follow the instructions below based on your chosen stack:
LAMP Stack Installation
If you prefer using the LAMP stack, follow these steps:
- Install Apache by running the following command:
sudo apt-get install apache2- Install MySQL by running the following command:
sudo apt-get install mysql-server- Install PHP and necessary extensions by running the following command:
sudo apt-get install php libapache2-mod-php php-mysqlLEMP Stack Installation
If you prefer using the LEMP stack, follow these steps:
- Install Nginx by running the following command:
sudo apt-get install nginx- Install MySQL by running the following command:
sudo apt-get install mysql-server- Install PHP and necessary extensions by running the following command:
sudo apt-get install php-fpm php-mysqlSecuring Mysql And Creating A Database For WordPress
Once you have installed the LAMP/LEMP stack, it is crucial to secure your MySQL installation and create a database for WordPress. Follow these steps:
- Run the following command to secure your MySQL installation:
sudo mysql_secure_installation- During the process, you will be prompted to set a password for the MySQL root user and answer some security-related questions. Follow the on-screen instructions to complete the process.
- After securing MySQL, log in to the MySQL shell by running the following command:
sudo mysql -u root -p- Once logged in, run the following commands to create a new database and user for WordPress:
CREATE DATABASE wordpress;
CREATE USER 'wordpressuser'@'localhost' IDENTIFIED BY 'password';
GRANT ALL PRIVILEGES ON wordpress. TO 'wordpressuser'@'localhost';
FLUSH PRIVILEGES;
Replace ‘password’ with a strong password of your choice.
With these steps completed, you have successfully installed the WordPress stack, updated server packages, set up the LAMP/LEMP stack, secured MySQL, and created a database for WordPress. You are now ready to proceed with the WordPress installation and start building your website.

Credit: www.digitalocean.com
Configuring WordPress On Digitalocean
Configuring WordPress on DigitalOcean involves a few essential steps to ensure a smooth and efficient installation. From downloading and setting up WordPress to configuring the wp-config.php file and completing the installation, each stage is crucial to the overall process.
Downloading And Setting Up WordPress
Begin by logging into your DigitalOcean account and navigating to the Droplets section. Create a new droplet and select the latest version of WordPress on Ubuntu. Once the droplet is created, access it via SSH and proceed with the installation process using the following commands:
$ cd /var/www/html
$ sudo wget https://wordpress.org/latest.tar.gz
$ sudo tar -xvf latest.tar.gz
$ sudo chown -R www-data:www-data /var/www/html/wordpress
After extracting the WordPress files, create a new MySQL database and user for WordPress, noting down the credentials for the next steps.
Configuring Wp-config.php
Navigate to the WordPress directory and rename the wp-config-sample.php file to wp-config.php using the following commands:
$ cd /var/www/html/wordpress
$ sudo mv wp-config-sample.php wp-config.php
Edit the wp-config.php file and fill in the database details, including the database name, username, and password created earlier. Save the changes and proceed to the next step.
Completing The WordPress Installation
Now, access your domain or IP address in a web browser to complete the WordPress installation. Follow the on-screen instructions to configure the site title, admin username, password, and email. Once done, you can log in to the WordPress dashboard and begin customizing your website.
Enhancing Security And Performance
When it comes to setting up your WordPress website on DigitalOcean, enhancing security and performance is crucial. Follow these steps to ensure your site runs smoothly and securely.
Setting Up Firewalls
Firewalls are essential for protecting your site from cyber threats. Configure DigitalOcean’s cloud firewall to restrict access and safeguard your WordPress installation.
Implementing Performance Plugins
Boost your site’s speed and performance by installing plugins like WP Super Cache or W3 Total Cache. These plugins optimize your WordPress site for faster loading times.
Enabling Https With Ssl
Secure your site with HTTPS by installing an SSL certificate. This not only encrypts data but also boosts your site’s credibility and SEO rankings.
Maintaining Your WordPress Site
To install WordPress on DigitalOcean, begin by creating a droplet and selecting the WordPress pre-set application. After setting up your domain, access the WordPress installation wizard via your web browser to complete the installation process. Following the prompts, provide the necessary information and finalize the setup to launch your WordPress site.
Regularly Updating WordPress, Plugins, And Themes
Keeping WordPress, plugins, and themes updated boosts site security.Backing Up Your WordPress Site
Backup your site regularly to prevent data loss in emergencies.Monitoring Uptime And Performance
Keep an eye on uptime and performance for a smooth user experience.Troubleshooting Common Issues
To troubleshoot common issues while installing WordPress on DigitalOcean, ensure that you follow the installation process step-by-step. Verify that the server requirements are met and that all dependencies are installed. Additionally, check for any errors in the server logs and ensure that the file permissions are set correctly.
Dealing With Error Establishing Database Connection
If you encounter an Error Establishing Database Connection in WordPress, check your database credentials in the wp-config.php file.
Handling The White Screen Of Death
To fix the White Screen of Death, disable plugins or switch to a default theme to identify the issue.
Resolving Permalink Issues
For Permalink Issues, navigate to Settings > Permalinks in the WordPress dashboard and choose a different permalink structure.

Credit: m.youtube.com
Conclusion And Next Steps
To complete the WordPress installation on DigitalOcean, finalize by configuring domain settings and optimizing site performance. Next steps involve customizing themes, adding essential plugins, and regularly updating content for optimal functionality and user engagement.
Reviewing The Installation Process
Exploring Advanced WordPress Features
Joining The Digitalocean Community
In conclusion, you have successfully installed WordPress on DigitalOcean. Review the installation process, explore advanced WordPress features, and join the DigitalOcean community to enhance your website further. Start by reviewing the installation steps and then delve into advanced WordPress features. Explore advanced WordPress features such as plugins and themes to enhance your website’s functionality. Join the DigitalOcean community to connect with other website owners for support and networking. Start your WordPress journey with confidence and creativity.Frequently Asked Questions
How To Install WordPress On Digitalocean?
To install WordPress on DigitalOcean, follow these steps: 1. Create a Droplet on DigitalOcean with the desired configuration. 2. Connect to your Droplet using SSH. 3. Install LAMP stack (Linux, Apache, MySQL, PHP) on your Droplet. 4. Download and configure WordPress by following the official WordPress installation guide.
5. Access your WordPress site by entering your Droplet’s IP address in your web browser.
Is Digitalocean Good For WordPress?
Yes, DigitalOcean is good for WordPress. It offers reliable hosting, easy setup, and strong performance.
How To Install WordPress From Terminal?
To install WordPress from the terminal, follow these steps: 1. Open the terminal on your computer. 2. Navigate to the directory where you want to install WordPress. 3. Use the command “wget https://wordpress. org/latest. tar. gz” to download the WordPress installation files.
4. Extract the downloaded files using the command “tar -xzvf latest. tar. gz”. 5. Move the extracted files to your desired location with the command “mv wordpress/*. “. That’s it! You have successfully installed WordPress from the terminal.
How Do I Install WordPress On A Remote Server?
To install WordPress on a remote server: 1. Download the latest WordPress version from wordpress. org. 2. Access your server via FTP and upload the WordPress files to the desired directory. 3. Create a MySQL database and user for WordPress. 4.
Rename the wp-config-sample. php file to wp-config. php and enter your database information. 5. Run the WordPress installation script by accessing your domain in a web browser.
Conclusion
Installing WordPress on DigitalOcean is a straightforward process that can enhance your website’s performance and security. By following the step-by-step guide outlined in this post, you can take advantage of the benefits of DigitalOcean’s cloud infrastructure and the flexibility of WordPress.
Elevate your website today!


